Monitoring a Stiebel Eltron LWZ
This text is years old and much has changed in this time –> For the most current version of the software go to https://launchpad.net/heatpumpmonitor.
My wife and I are the owners of a Stiebel Eltron LWZ 403 SOL heat pump. During the commissioning of the heat pump the service guy used a notebook which was connected by its serial interface to the LZW. I got a look at the software and saw that it is possible to get the actual values like DHW temperature, flow temperature, relative humidity, … via that interfaces. I was interested at once as I was told before installation that it is not possible to monitor the LWZ via a PC, but it was something I really wanted to do. So I convinced the service guy to let me have a closer look at the serial cable to find out which PIN of the head pump is connected to which pin of the serial interface of his PC.
This way my adventures to find a way to monitor the LZW with my Linux server (which runs anyway 24×7) started. This page is the documentation of what my research dug up and was able to build, be it software or hardware. Maybe it helps someone else. Every time I find something new to document I will add it to this site. If anyone discovers an error or has additional information please send me a mail (my email address can be found on the about page). Thx!
0. Current status of the project
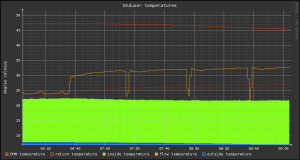
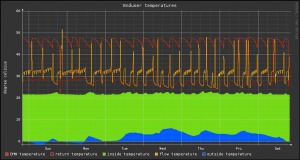
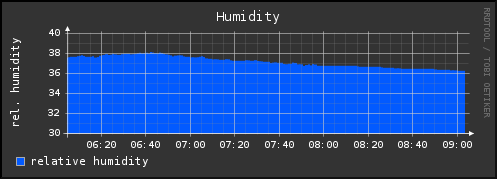
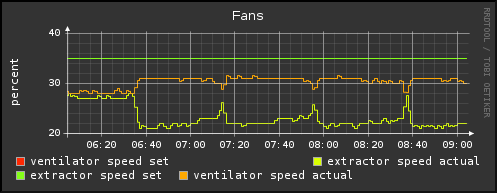
I’ve a alpha version running which rendered the graphs shown in the on this page. The software and an short howto install it can be found on the end of this page.
1. Head pumps with the same interface
It seams that the serial interface is the same for various types of Stiebel Eltron LWZ heat pumps. I think that following have the same RS-232 interface.
- Stiebel Eltron LWZ 303
- Stiebel Eltron LWZ 403
- Stiebel Eltron LWZ 303 SOL
- Stiebel Eltron LWZ 403 SOL
I also believe that the Tecalor THZ devices like these
- Tecalor THZ 303
- Tecalor THZ 403
- Tecalor THZ 303 SOL
- Tecalor THZ 403 SOL
are the same stuff, just re-branded. Or the other way around – I don’t know who the original manufacture is.
2. Physical connection
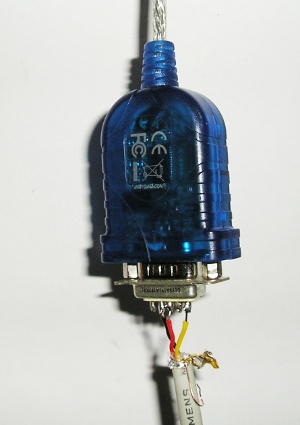
On the PC side you just need a Sub-D9 female connector as shown in following photo.
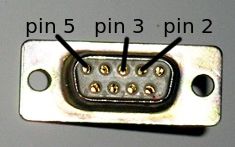
The pins 2,3 and 5 are marked as these need to connected via the cable to the heading pump.
- Sub-D9 Pin 2 with Mate-N-Lok Pin 1
- Sub-D9 Pin 3 with Mate-N-Lok Pin 2
- Sub-D9 Pin 5 with Mate-N-Lok Pin 3
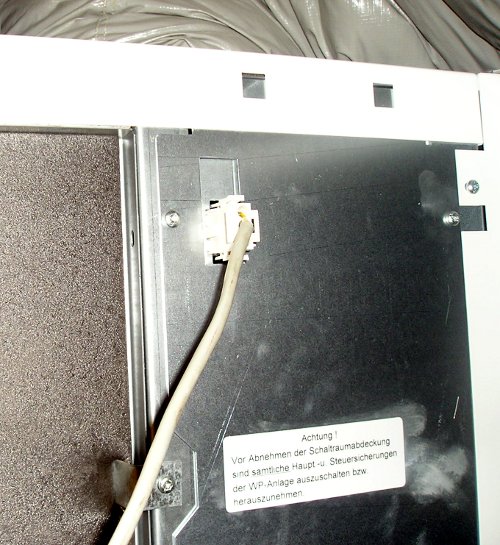
On the heat pump site you need the connector and pins shown in this picture.
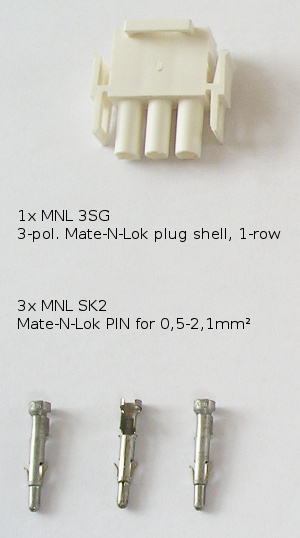
I got mine from this Reichelt, which is a online shop in Germany. Use this direct link to the Mate-N-Lok items. As a cable I just used a better (shielded) telephone cable with 4 wires. It is about 15m long to allow a connection from the heading room to the “server room”.

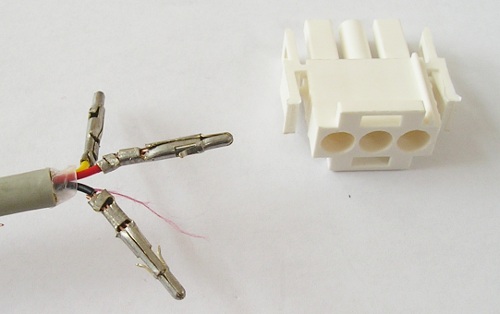
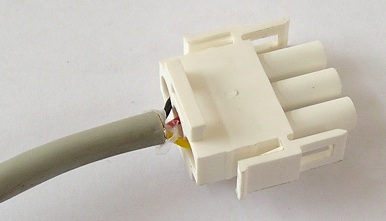
Following photos show how I connected the stuff together and should give you impression how to do it, even if you never have done something like it. On the PC site I used an USB-to-serial adapter for testing as my notebook does not have a serial port.
3. RS-232 interface and communication protocol
As a look at the software from the service guy showed, the connection is made with 9600 baud. The rest is than quite obvious – I’m using 9600,8,N,1 to talk to the head pump.
After this easy stuff it gets a little bit more complicated – as the communication is binary I use hexadecimal numbers to represent each byte.
3.0 Basics
The CPU of the LWZ seems to be big-endian, maybe a MIPS or ARM? This is important as you PC is most likely little-endian. You’ve no clue what I’m talking about? Take a look at this wikipedia article.
A look at the answers the LWZ returned to me lets me believe that they are using 16bit integers to send floats. They just have a fixed number of decimal digits. For example as version I get 01 B6 which is 438 in decimal (the formula is dec(0xb6+0x01*256)), now divide this by 100 and you get a version 4.38.
3.1 Greetings
After the connection is opened by your PC send following.
![]()
which will result in following return by the heat pump if you’re connected correctly.
![]()
Now you know that your wire-ring is good and you’ve the correct settings for your serial interface. Both bytes you’ll see throughout the protocol. 02 stands most likely for “start of communication” and 10 for acknowledgement. As 10 03 is used for the footer every occurrence of 10 in the normal datastream is escaped by a 10.
3.2 Get the version
Your version of the interface is maybe different from mine. Following will show you the version of the heat pump software. The version of my LWZ is 4.37. With the first request you tell the heat pump what you want, it writes then back an ok. After that ok, you can request the data:
![]()
After this you get
![]()
Which tell you your request is ok (10) and it does have data, which wants to send now (02). You will acknowledge that like this
![]()
so the heat pump starts sending the data, which looks like this

As all data responses seem to be headed by 4 byte, I believe it is some kind of header. And the last 2 byte look like a footer for me.
3.3 Get the actual values
The most important values for my monitoring can be extracted by following request.
![]()
which leads as usual to following answer
![]()
and we request the data as usual like this.
![]()
This is than answered by a quite large block which tried to comment as far as I understand it.
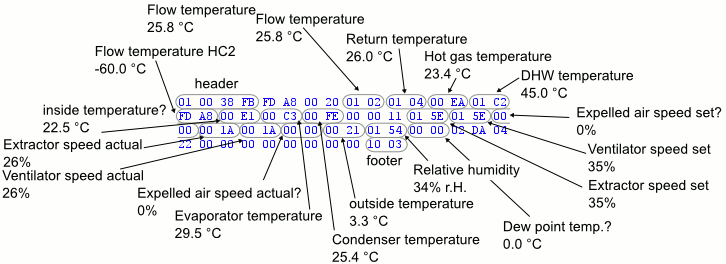
Some stuff is marked by a ?, as I’m not that sure if it is correct. Only time will show if these are the correct values. As 10 03 is used for the footer every occurrence of 10 in the normal datastream is escaped by a 10.
4. The Software for monitoring
Currently I’m working on that part. As some people have requested the work in progress version of the program I’ve released the 0.2 version to the public (under GPL 3). It it is basically an alpha version which has almost no error handling and if the heat pump sends anything it does not understand it stops. Still I was able to create the graphs shown in on this page. At this point it has only be tested with my LWZ and its software version 4.38. I would be very interested if it works with others too or if not where exactly it breaks.
4.1 Requirements
The software is written in Python and should run on with Version 2.4-2.6. It has been developed on a Linux system ((K)ubuntu to be exact) but it should run also any POSIX system for which the required libs and programs are available. It even should work under Windows, but it is not tested. You need to have following libs and programs installed:
- pySerial (I’m using Version pyserial-2.5-rc1)
- pyrrd (I’m using Version PyRRD-0.0.7)
- rrdtool (I’m using 1.2.19-1ubuntu1 from Ubuntu server 8.04)
I’ve listed the version I’m working with it but similar versions should also work as I’m not using anything special.
4.2 Download
All new version are released on Launchpad.net – take this link to the project page
Old releases:
Version 0.2 Minor feature release: heatpumpMonitor-0.2.tar.bz2
Version 0.1 First public release: heatpumpMonitor-0.1.tar.bz2
4.1 Installation
Copy the files somewhere, e.g. /usr/local/sbin/ and edit the file heatpumpMonitor.py and change the configuration to your likings. Don’t forget to create the paths you need!
For testing call the protocol.py directly like this python protocol.py. If call this way it only tries to connect to the heat pump and return something like this if everything worked:
{'expelled air speed actual': 0, 'return temperature': 26.0, 'relative humidity': 23.0, 'condenser temperature': 25.399999999999999, 'flow temperature': 25.800000000000001, 'extractor speed actual': 27, 'evaporator temperature': 20.399999999999999, 'DHW temperature': 47.100000000000001, 'inside temperature': 22.5, 'ventilator speed set': 35.0, 'extractor speed set': 35.0, 'hot gas temperature': 27.800000000000001, 'flow temperature HC2': -60.0, 'expelled air speed set': 0.0, 'ventilator speed actual': 27, 'softwareVersion': 4.3799999999999999, 'dew point temp.': 0.0, 'outside temperature': 5.0999999999999996}
If you got something like the above you can start the program for real like this heatpumpMonitor.py start and take a look at the logfile for any output.
Send me mail if you like the program or if something doesn’t work. If someone wants the program at this point send me a mail (address at the end of the About page).
Powered by WordPress
Entries and comments feeds.
Valid XHTML and CSS.
31 queries. 0.061 seconds.


